Do you really even need autoguiding?
Serious astrophotographers know that autoguiding, although very useful is not always necessary. There are some mounts that are extremely accurate at tracking for short periods of time, even up to 5 minutes without the need for autoguiding. There are also some who would argue that dozens or even hundreds of short unguided exposures when stacked together can produce remarkable results, and they are right, as long as you have the tools to stack and process images after you take them. Others take the position that there is no better way to improve signal-to-noise ratio than to take long exposures. The downside of taking long exposures is that if one image is ruined by clouds or passing satellites or meteors, a substantial portion of your night’s work can be trash. A nice compromise is to take 3 to 5 minute exposures, and most mounts cannnot give good results for those periods without autoguiding. Even if tracking is perfect, there are periodic errors that need to be corrected in all but the highest qualtiy (and most expensive!) mounts. If you choose to use autoguiding, here are a few things to keep in mind.
What is autoguiding?
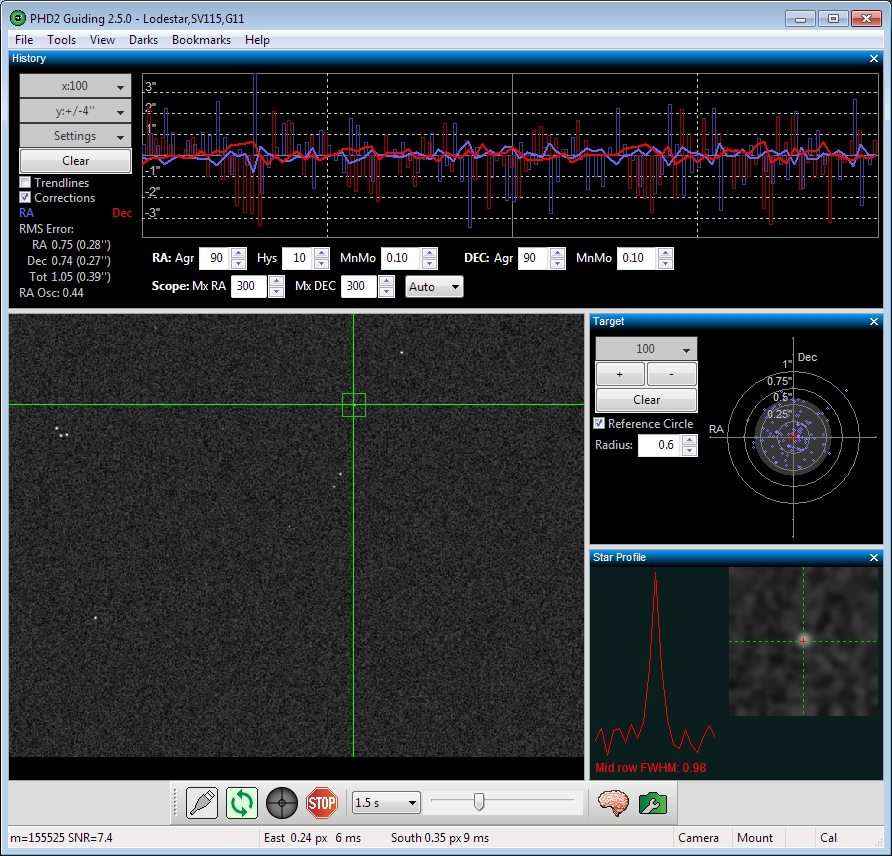
Astrophotography autoguiding is a technique used by astrophotographers to capture high-quality images of celestial objects with long exposure times. It involves using a second camera or a dedicated autoguiding device to track a guide star and make minute adjustments to the telescope’s mount to compensate for the Earth’s rotation or imperfections in the mount’s tracking, and keep the target object in the same position in the field of view. Even a few pixels deviation can result in elongated stars or the appearance of being out of focus. All but the most expensive telescope mounts exhibit a small amount of periodic error that results from the rhythmic irregularities in the gears, and will require autoguiding to ensure perfectly pinpoint circular star images in long exposures.
There are several methods of autoguiding for astrophotography , including:
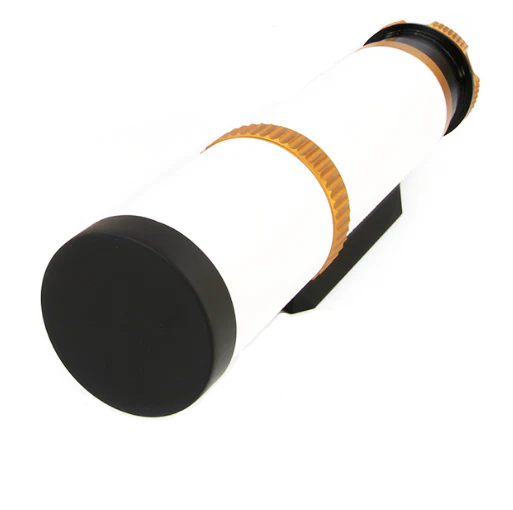
Separate guide scope:
In this method, a separate guide scope is attached to the telescope mount, and a guide camera is used to track a guide star. The guide camera sends signals to the mount to adjust its position and keep the guide star centered. One of the most common guide scopes is the William Optics Slide-Base UniGuide 50mm, available in red, gold and gray for $171.
Advantages:
Flexibility: A separate guide scope allows you to use different guide cameras with different specifications and sensitivities to choose the best one for your imaging setup. It also enables you to see the star field near the intended target, which can allow the choice of guide stars.
Accuracy: Using a separate guide scope can provide accurate tracking of the guide star, resulting in sharp and precise images. The focal length of the guide scope must be long enough to correct for small changes in the star position of the longer focal length of the main telescope. Technology has advanced to the point that even small focal lengths are adequate for accurate tracking.
Cost-effective: A separate guide scope can be a cost-effective solution for autoguiding, since guide scope and camera are usually not that expensive compared to the cost of a quality off-axis guider or dual-chip imaging camera.
Independent light path: The light path of the guide scope is outside the main imaging light path, which means that any filter inserted in the main image train will not affect the guide camera. Therefore, dimmer stars can be used for guiding in the guide scope.
Disadvantages:
Additional weight and bulk: Adding a separate guide scope to your imaging setup can increase the weight and bulk of your equipment, making it more challenging to set up and transport.
Alignment issues: Aligning the guide scope with the main telescope can be challenging, and even minor misalignments can result in significant tracking errors. Generally speaking, if the guide scope is relatively aligned with the main scope, today’s technology overcomes all but substantial difference in pointing. By the same token, if the guide scope is not firmly attached to the main telescope, movement in the main telescope may not be perfectly transmitted to the guide scope because of a phenomenon known as differential flexure.
Time-consuming: Setting up a separate guide scope can be time-consuming, especially if you’re new to astrophotography and autoguiding. However, once you have it set up, you generally don’t need to make regular adjustments.
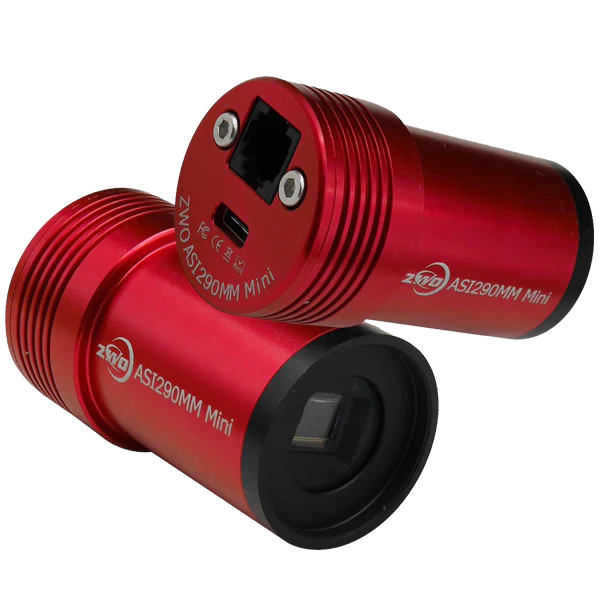
You need a separate camera to attach to the guide scope: Obviously, the guide scope won’t guide itself. An additional piece of hardware is required, which adds to the overall weight of the setup. A very popular, inexpensive and lightweight guide camera is the ZWO ASI290MM Mini Guide Camera, available for $249
Overall, a separate guide scope can be an effective and cost-effective solution for autoguiding in astrophotography, but it requires careful consideration of its advantages and disadvantages and proper setup and alignment to achieve accurate and sharp images.
Off-axis guider:
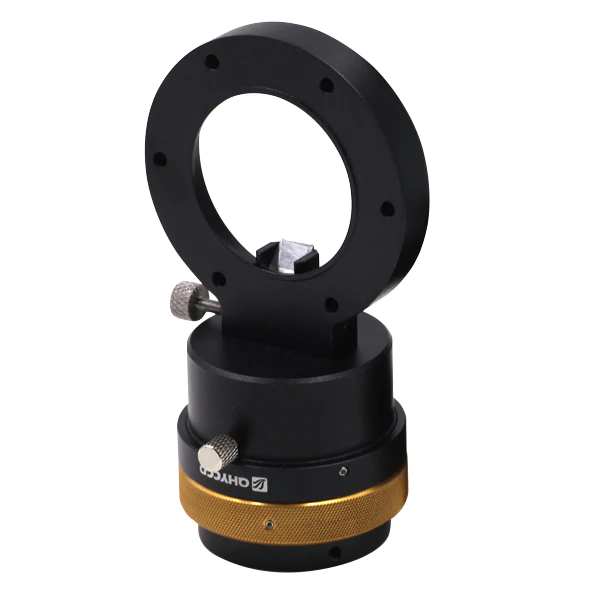
An off-axis guider is a device that sits in front of the camera and uses a prism or mirror to divert some of the incoming light to a guide camera. This method is more convenient and compact than using a separate guide scope, but it requires careful focus coordination of the guide camera with the main camera’s field of view. An example of an off-axis guider is the QHY Medium Off-Axis Guider available for $230.
Advantages:
Compactness: With off-axis autoguiding, there is no need for a separate guide scope, which reduces the overall weight and bulk of your imaging setup. This can be particularly useful if you’re using a portable mount or want to travel light.
Convenience: Off-axis autoguiding is more convenient than separate guide scope autoguiding, as you don’t need to align and balance a second scope or adjust its position for optimal performance.
Stability: With off-axis autoguiding, the guide camera and main camera are fixed on the same optical axis, reducing differential flexure and other sources of tracking error that can occur with separate guide scopes.
Disadvantages:
Alignment issues: The most significant challenge with off-axis autoguiding is aligning the guide camera with the main camera’s field of view. This requires careful adjustment and calibration, and even minor misalignments can result in tracking errors. Most high quality off-axis guiders allow for adjustment of the prism to make this easier.
Narrow field of view: With off-axis autoguiding, you’re limited to using a small portion of the main camera’s field of view for guiding. This can make it more challenging to find a suitable guide star and can limit your imaging options. If the image circle of the telescope is small, the stars that are visible in the zone of the off-axis prism can appear out of focus, or comet shaped. In my experience, a small out-of-focus star or guide star that exhibits a small amount of coma is generally overcome by current guiding software, such as PHD2.
Limited sensitivity: Off-axis autoguiding can be less sensitive than separate guide scope autoguiding, as the guide camera is typically smaller and less sensitive than a dedicated guide scope and the guide star image is taken from a small area, picked off from the main light path.
Framing adjustments: When using off-axis guiding, sometimes adequate guide stars are not visible without rotating the off-axis guider. If the main camera is rotated also, the framing of the intended object changes. With modern guide cameras with decent size sensors with high sensitivity, this problem is minimized or even eliminated.
Overall, off-axis autoguiding can be a convenient and compact solution for autoguiding in astrophotography, but it requires careful attention to alignment and calibration to achieve accurate tracking. It may be a good option if you’re looking for a portable and easy-to-use autoguiding setup, but it may not be ideal for all imaging situations.
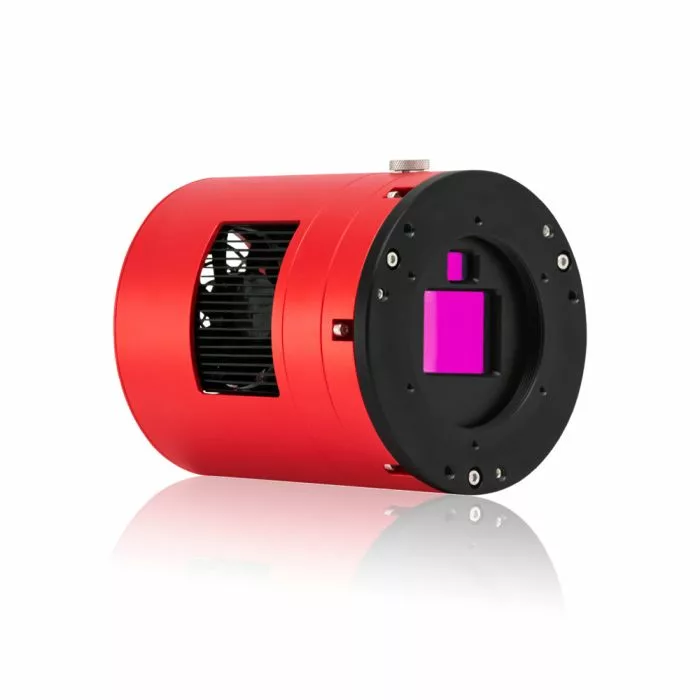
Dual-chip camera guiding:
This is done with one camera that has 2 side-by-side sensors, one for imaging and a small one for autoguiding. Santa Barbara Instrument Group (SBIG, now Diffraction Limited) pioneered the development of this type of camera with the ST-7, ST-8, and ST-9 models. A recent example of a dual-sensor camera is ZWO ASI2600MC-DUO Built-in Dual-Sensor Astronomy Camera available for $1999.
Advantages:
No need for second camera: This is a big advantage since you don’t need to spend money for a second camera. The main sensor and guide sensor are controlled separately, allowing the main sensor to take the image and the guide sensor to issue corrections to the mount.
Disadvantages:
Framing adjustments: Much like with the off-axis guider, adequate guide stars may not be visible on the guiding sensor. And since its position is fixed relative to the main sensor, rotation of the whole camera might be necessary to find a good guide star. Again, with modern guide sensors being bigger and more sensitive to light than older versions, this problem is not usually an issue.